Reference Manual
Reference Manual
Have you noticed how difficult a Cutlass rocker headlamp switch
has made it to "Flash" your highbeams when the headlights are off? After a few
times where I wished to flash the lights to warn oncoming traffic of a hazard they
were headed for, and not doing so because it was such a pain. I stumbled across
some instructions
on the Impala SS site describing how to add Flash-to-Pass to that vehicle.
Because GM has used virtually the same steering column in every car they build, it
was a small step to conclude the same 94+ Cadillac Fleetwood switch could be added
to G-body.
Old link appears to be dead. another one.
If you haven't dropped a column and/or removed the cluster
surround before, plan on an afternoon. If you are familiar with these tasks, 1-2
hours. Both the previous estimates do not include the time to make the required
power wire.
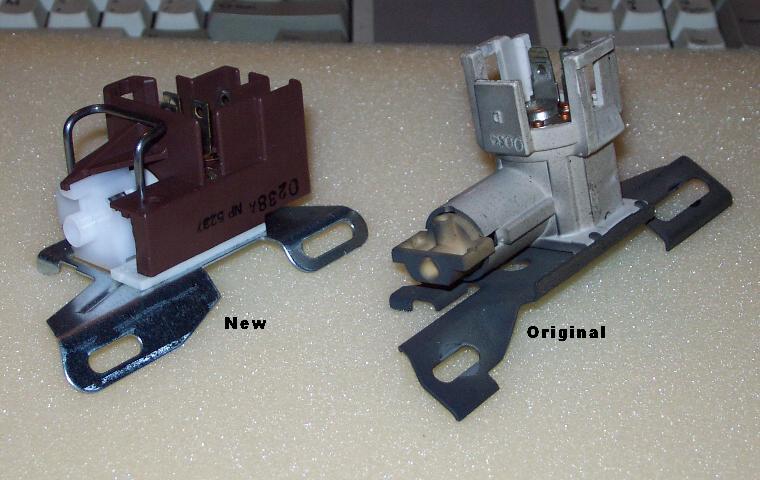
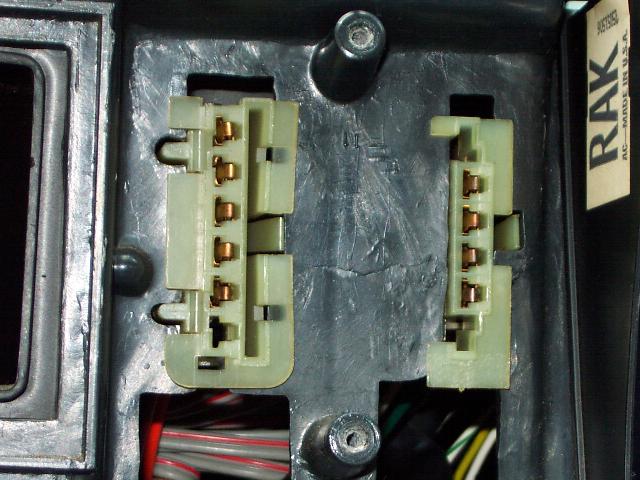
Above an original switch (on the right), and the new switch (on
the left).
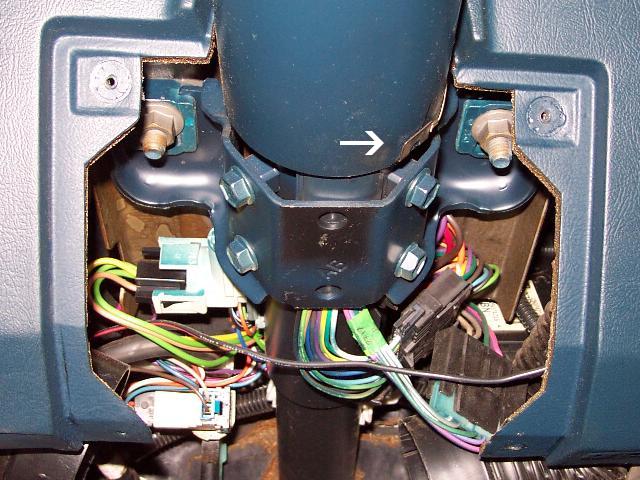
At this point you should be looking at something like the
above. Note that the shift indicator cable is still attached.
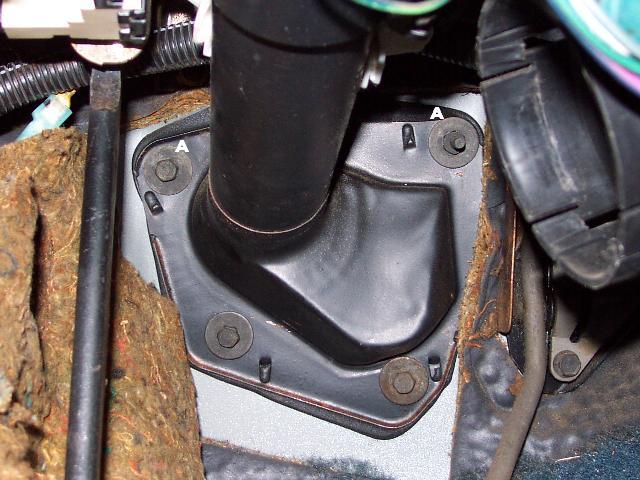
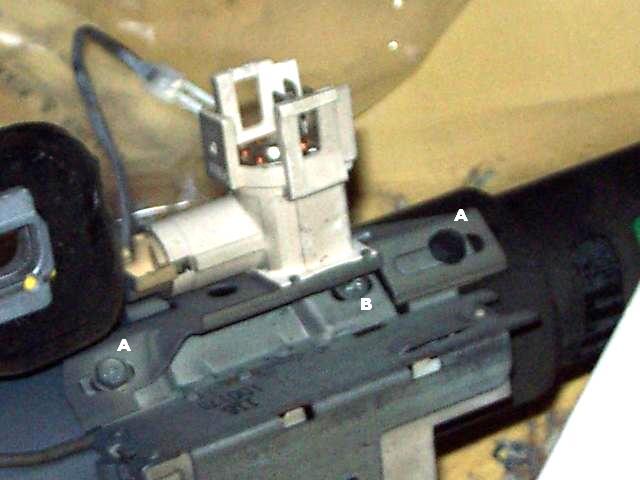
Here you can see the mounting screws "A", also note the silver
screw under
the tall part of the switch "B", we'll be using that location later.
Now we have to get FtP power to the dimmer switch, the rocker style switch has an unused terminal that has constant +12 on it and is protected by the headlamp circuit breaker in the switch. Perfect! Are you getting the feeling GM designed for Flash-to-Pass yet?
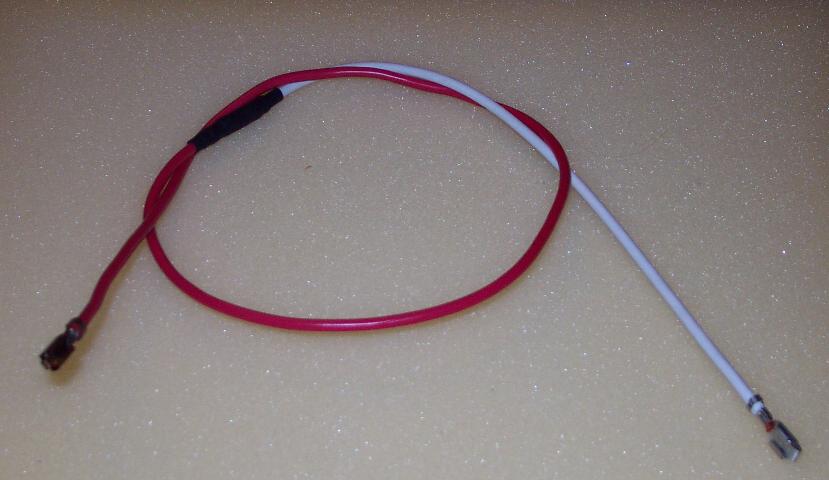
Here's my new power wire ready to install, at 31" long, it's
sized for eventual insertion into the factory harness. The joint is a crimped and
soldered uninsulated butt connector picked up at Radio Shack and covered with 4
layers of shrink tubing.
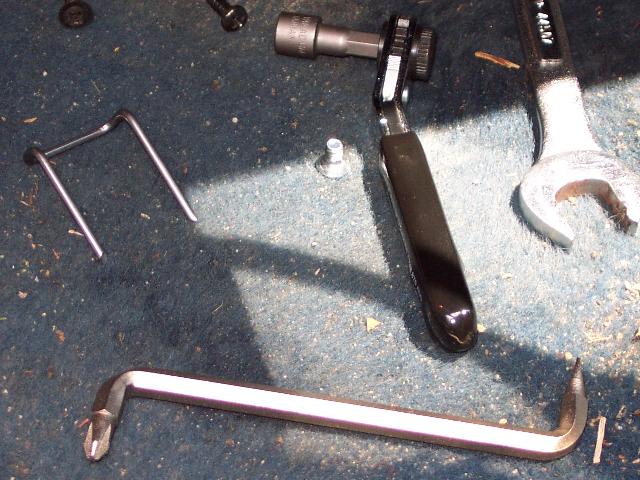
A tool suggestion. At the bottom of this pic, you can see my
favorite tool for removing the trim panels on either side of the cluster. By
inserting the slotted screw end into the vent and hooking the back side of the
vent, the panels can be easily removed without damage.
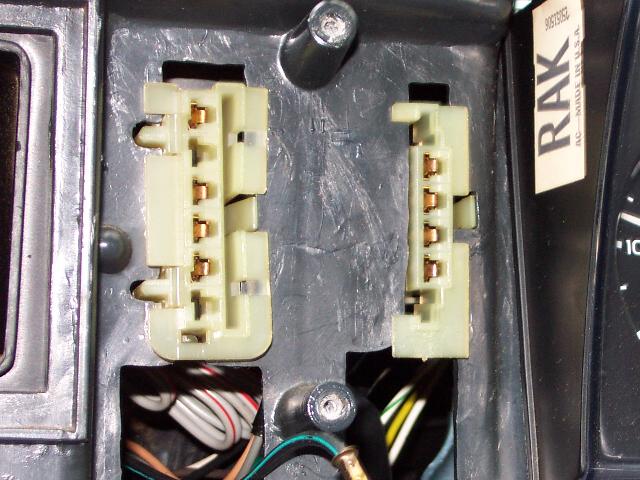
Here's what you'll see after removing the headlamp switch from
the i.p. adaptor. Note that the second position from the top of the left connector
is empty, not for long.
Here the connector has been pulled out, opened up and the new
power wire inserted.
The connector reinstalled in the i.p. adaptor.
DON'T INSTALL THE HEADLAMP SWITCH YET!!! If you do that nice new power lead hanging somewhere behind your dash will have +12 on it and will find something somewhere to short out against.
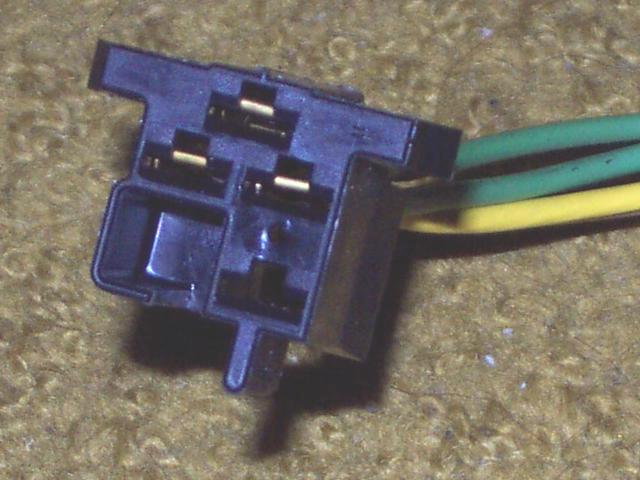
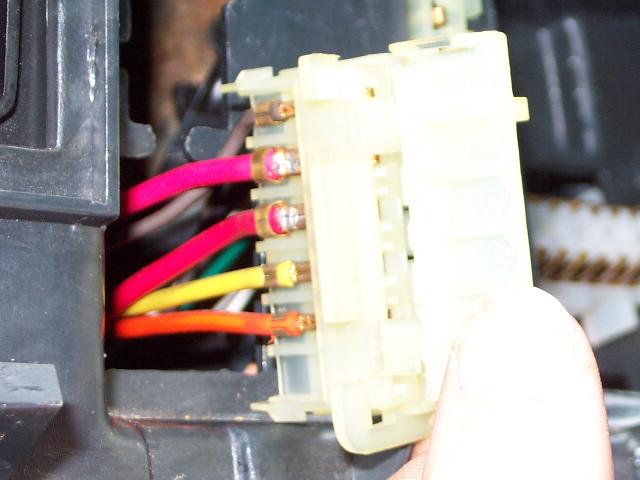
Here's a dimmer switch connector. You can see the empty
position at the bottom right of the connector, this is where we'll install the new
power wire.
| Table of Contents | Top of Chapter | |
|
|
||
| Copyright © 1998-2024 by The Members of The Oldsmobile Mailing List. All Rights Reserved. This web site is not affiliated with General Motors or Oldsmobile. General Motors and Oldsmobile are trademarks of their respective companies. The owners and members of this site are not responsible for errors or inaccuracies. | ||